Monday, October 31, 2011

Christmas Outfits

Here are a few quick snaps of the Christmas outfits for 2011! I am currently taking orders, so hurry before the fabric is all gone!

Thursday, October 27, 2011

Dinosaur! Rawr!

What I've been working on!

Thursday, August 11, 2011

More new stuff!


New in the Etsy shop

Available for order now in my Etsy shop in size 12-24 month


Thursday, August 4, 2011

Another piece of progress

Today's menu consisted of lots of fabric, hot glue, and staples --provided by my friend, the electric staple gun. (Insert Tim Allen's Home Improvement man-bark here!)


I started out by recovering a bulletin board in my son's room. Super simple, quick fix for an outgrown memo board. One thin layer of batting, wrap it in fabric, add a few little details, and done!


I thought the nails and hooks were very masculine!

----------------------------------------------------------------

Then I tackled some wall art for sister's room. This time I covered three 16x20 canvases with fabric, attached fabric letters, and embellished with scrappy flowers and buttons.


I'm very pleased with the outcome.


Mostly because I love this fabric soooo much! I really don't think I could dislike anything made with this.


It's going to be a sad day when I either 1) run out of fabric


or 2) run out of walls/windows/pillows/thingies to cover with it.


Oh, and I finally am starting to figure out the manual settings on my DSLR! I've been trying to learn myself, because that's how I roll, but until today it didn't really click. My kids' rooms are hard, because the lighting is bad but I'm finally getting it! Excited!

Monday, August 1, 2011

Pinterest Wreath

I've recently become addicted to Pinterest. Specifically, the iphone app. It's so fun to peruse the pictures while I lay on the couch or while hubby watches sports on TV. I have tons of pins on tons of boards! Last night I made my first Pinterest craft-- a scrappy fabric wreath!


It's no secret I like bright colors! I really love orange, and I think it looks great on our dark red, slightly outdated front door.


It even fits nicely behind the storm door. Win!


I used a large metal ring that I found in the jewelry section at Hobby Lobby for $2.47. Stuck a small nail in the back side top of the door and hung the fabric loop on it. Done. And Simple!

What do you think?

Saturday, July 30, 2011

Pillowage

It's neat how throw pillows can really bring together the decor in a room. Lately, every bedroom in our house has gotten a new pillow or two. I started with this one.


I found this neat printable chandelier iron-on. I have to admit, my little inkjet printer spit out a gray chandelier.. so I used a black paint marker over it after I ironed it on-- which I would assume makes this pillow not very washer-friendly. Good thing it's on a grownup bed!


Next, the boy's bedroom got two new pillows. I just made a simple envelope pillow over for the larger pillow, and then used some scraps to make a small pillow.


It really ties in the curtains and wall art!


Now, the girl's room is a forever work-in-progress. I just finished the valance this week finally,


and these two floral throw pillows.


Again, another simple envelope cover for an existing square pillow, and a smaller envelope with three scrap flowers sewn on. For some reason, my children love to destroy pillows -- every button, tie or cute "extra" inevitably ends up torn off. I wonder what the fascination is... anyway, these flowers had to be sewn down tight. I sewed them in a circle radiating outward through all the layers until all the little petals felt secure.


I love the difference it makes!

Thursday, July 7, 2011

Be jealous.

Some projects don't turn out like you want them to. And some blow your expectations so far out of the water they end up in orbit around the earth. This is one of those times.


Remember this little gem? I picked it up at a flea market/junk shop in my small town for $20. As soon as I got it home and started inspecting it, I thought, "Crap. I got taken. This thing is a hunk of junk!" It has potential on the outside, but the back, corners, insides, etc. were not looking (or smelling) promising. It sat in the garage for about a week while I mulled over the possibilities. Then I took it to my friend Jessica and pleaded for her to help this poor wretched dresser become lovely again. And that is exactly what she did.


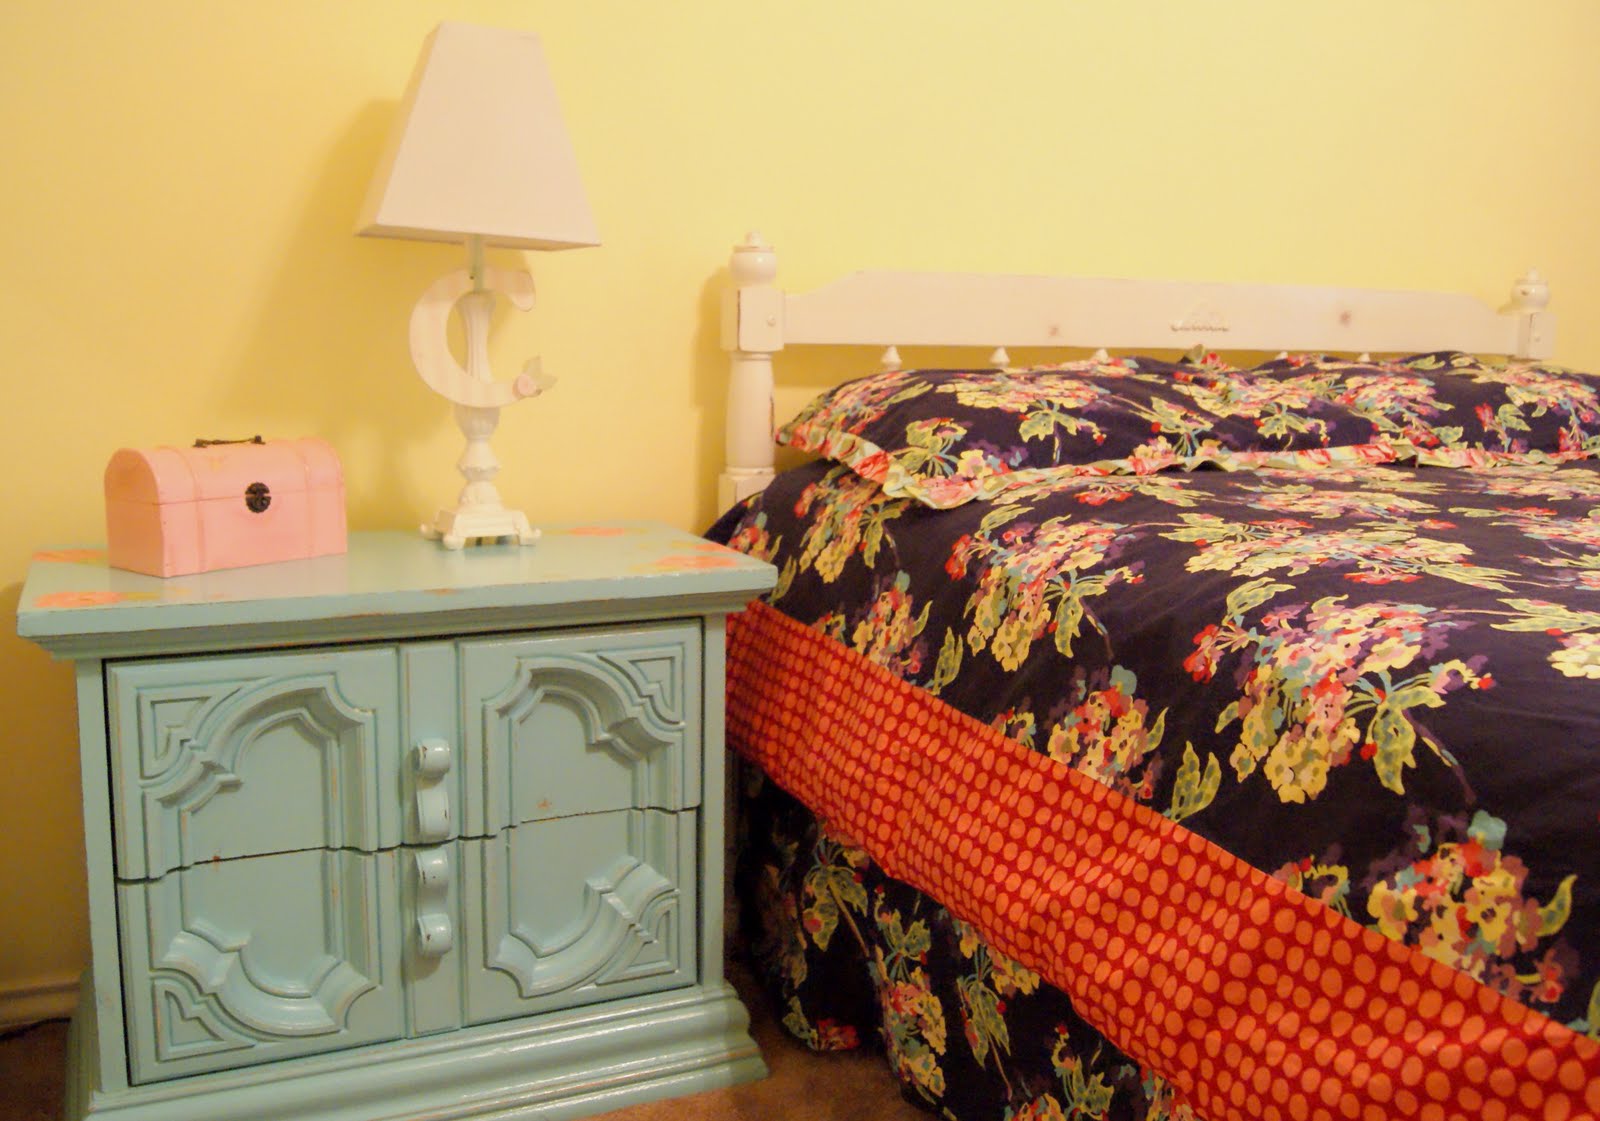
At home, I added two coats of polycrylic finish to it, and here it is in the room. It is painted to match an accent fabric in the bedding (the small ruffle around the pillow shams), and I've yet to make some larger shams, and a valance with that same fabric, which will really tie it all together.


Over and above anything I ever dreamed this hunkajunk could become! I tell you, she is a miracle worker.


Still, the inside was a problem. This dresser was meant to be a nightstand in my preschool daughter's room, and the drawers will be holding her clothing. So, they must be clean. And clean they were NOT. I scrubbed, sanitized, scraped, and still the smell and staining was ewwwgross. So, I had to cover it up. Here is what I came up with.


Scrapbook paper leftovers, Mod Podge, and then one quick coat of polycrylic to finish-- and perfection, no? Now this odd duck is beautiful, inside and out.

Be jealous of my serendipitous one-of-a-kind success!

Sunday, June 26, 2011

Reverse Knot Dress and Ruffle Peasant Dress

Fancy ruffled peasant dress:

Available in sizes 12m to 5Years here.


This is the New and Improved Reverse Knot Dress. It has wider, longer sash straps, and a ruffle at the hem. It is available here.


Monday, June 20, 2011

Distressed Dresser - before and after


I have had this thing finished for a couple of weeks, but forgot to post the pictures. Here is the dresser I painted to match the bed from the previous post. I L-O-V-E the pieces together.

Before: This dresser belonged to a friend, whose boys are grown and it wasn't being used anymore. It was originally painted (or stained) black, but her husband had started taking off the black already. I received it as a "project in progress" and was more than happy to transform this boy dresser into a shiny chic girly dresser!


After lots of sanding and about three coats of white paint:


Finished! I changed out the knobs to some fun mismatched glass knobs, and again added the wooden scrolly doohickeys on the cabinet door.


Doesn't the distressing look fantastic? Thanks again to my friend Jess!!


Here it is in Carly's room. I'm terrible at taking indoor pictures, so you get what you get, but I think it looks great with the yellow walls, and the pink and green accessories.


Next up: my crazy self bought this nightstand at a flea market..


It's a nightstand (or something) that looks like a cabinet with doors, except it is actually two drawers thast slide out. It's interesting! It's unique! It's gaudy! And sooo ugly!

I LOVE IT!

.....any guesses what my plans are for this gem?! It will go in the same room, but it ain't gonna be white, that's for sure! And it won't be one solid color. My husband just shakes his head at me.. :-)
Related Posts Plugin for WordPress, Blogger...