


This week I've been on a cleaning and organizing kick, and today I tackled this:

When my husband opens this drawer, he cringes and closes it as fast as he can. I laugh and tell him I know exactly where everything is, and I like it that way.
So maybe I lie a little.
I went through that drawer (in fact, the entire bathroom with it's three cabinets, five drawers, and one large linen closet) and now it looks like this:

And both trash cans are overflowing with expired and unused products. Feels good! Yay me!
I ran into a problem when I needed a place for my hard headbands. I've been wanting to make a smooshy fancy holder dealie and sketched up a design for something like a boudoir pillow and then quickly abandoned that idea at the thought of putting gussets on something that would grace the inside of a bathroom drawer. Then I turned to the good ole blogosphere and found this idea. I decided to use fabric and hot glue instead of paper and Mod Podge.
So here is all you need to make this cutie:

-- Large [empty] oatmeal container
-- fabric - 19 x 15" piece
-- batting - any kind will do. I used high loft and doubled it for more squish.
-- hot glue gun
-- large decorative button
Cut the batting to the size you need for your container. My piece was 34" long and 9.5 wide and I wrapped it around the can twice. Apply hot glue and start gluing and wrapping the batting around the container. You don't need to pull it too tight as you wrap, because you want it to be nice and smooshy.

I used a LOT of glue. For the batting it ended up being quite unnecessary, and really you only need to use one strip of glue around each edge (around the top and bottom of the can).

Here is my double-wrapped batting covered oatmeal can.

Now start wrapping the fabric around. Let about three inches of fabric hang over the bottom edge of the can, and let the other inch or so lay over the top (lid side).

Wrap the fabric, using a strip of glue around the edges. Pull it taut as you wrap, but not too tight. When you get to the end, fold the raw edge under and glue down. That way no raw edges of fabric are exposed. Leave the ends open where they hang over the top and bottom of the can.

Now, start tucking the ends into the can and glue down.

Keep tucking and gluing until you get it all inside.

Here's the inside of the can. It's not super cute, and if you wanted to use the inside for storage, you could mod podge some cute paper or fabric over the raw edges. I'm not planning on using mine for that, so I skipped that idea.

If not, put the lid on and you're good!

Noe for the bottom, use the same tucking and gluing technique as above. Be liberal with the hot glue.
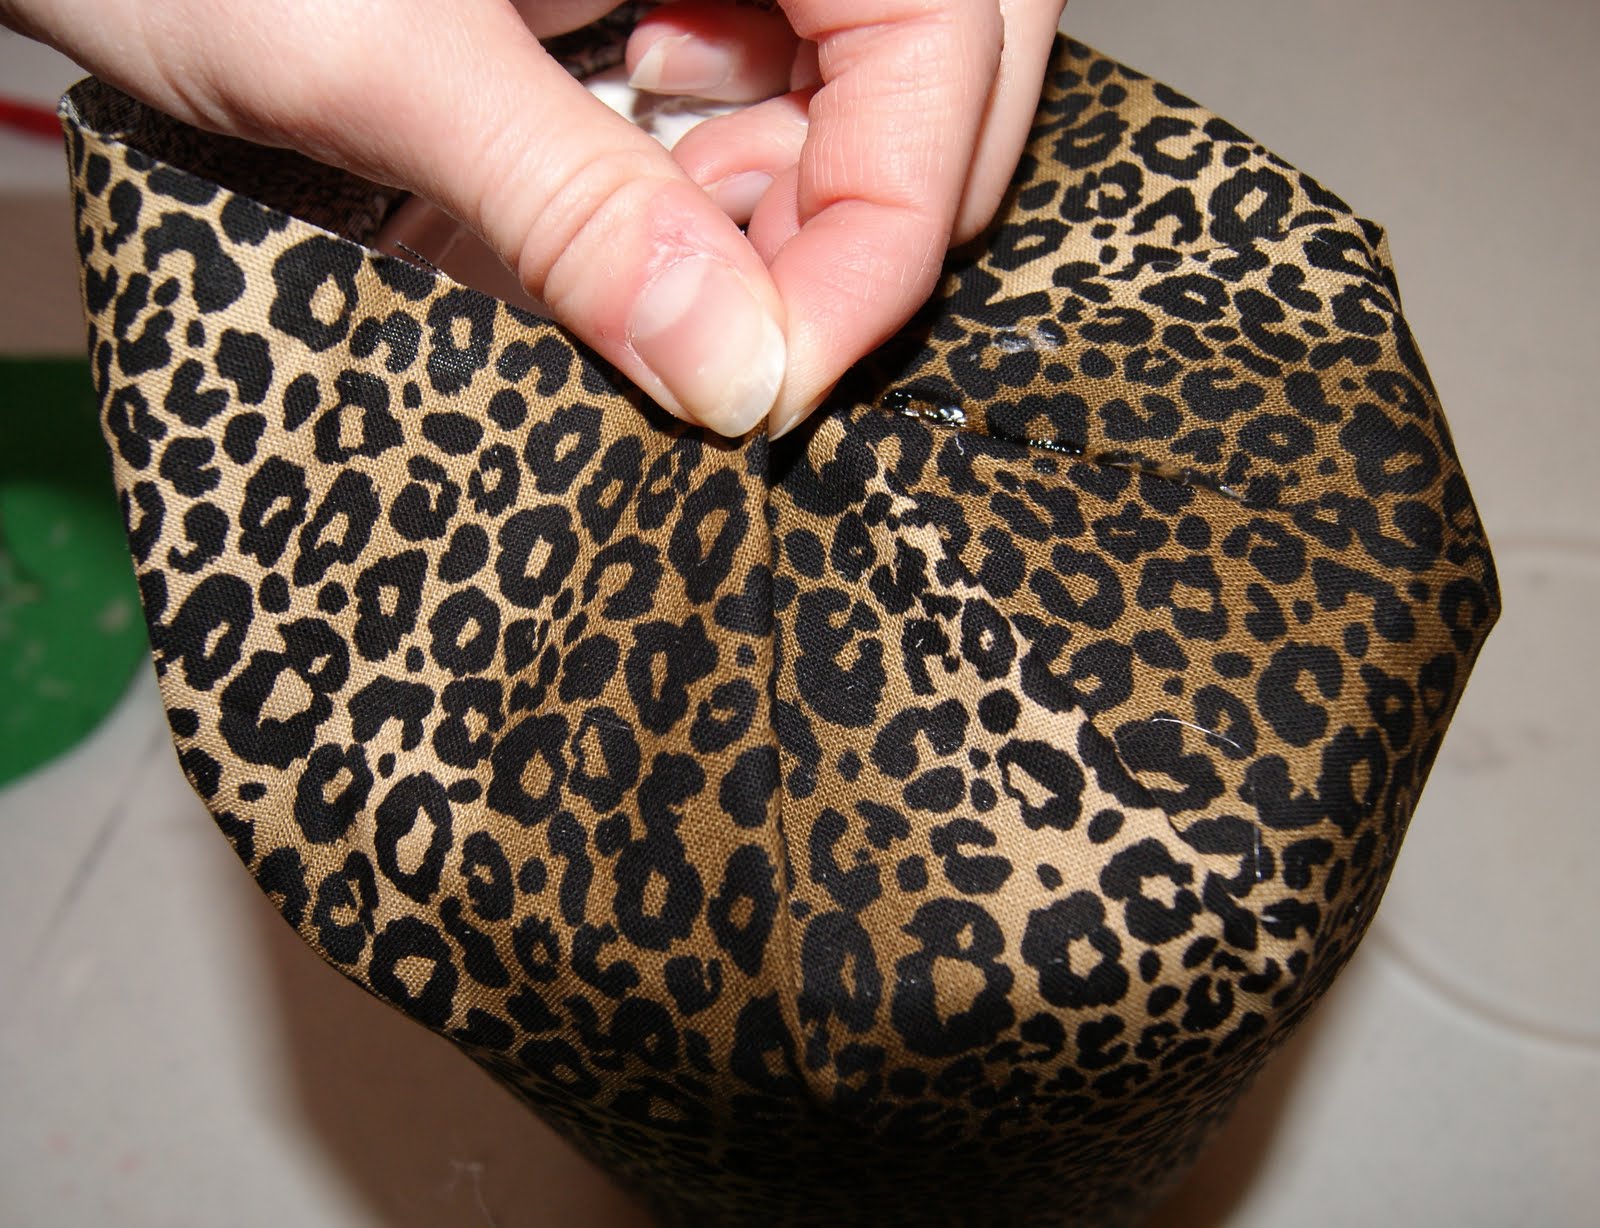
Keep going until you get it all glued down. Notice I was a little too liberal with my glue and it oozed out in a few places. Don't do that.
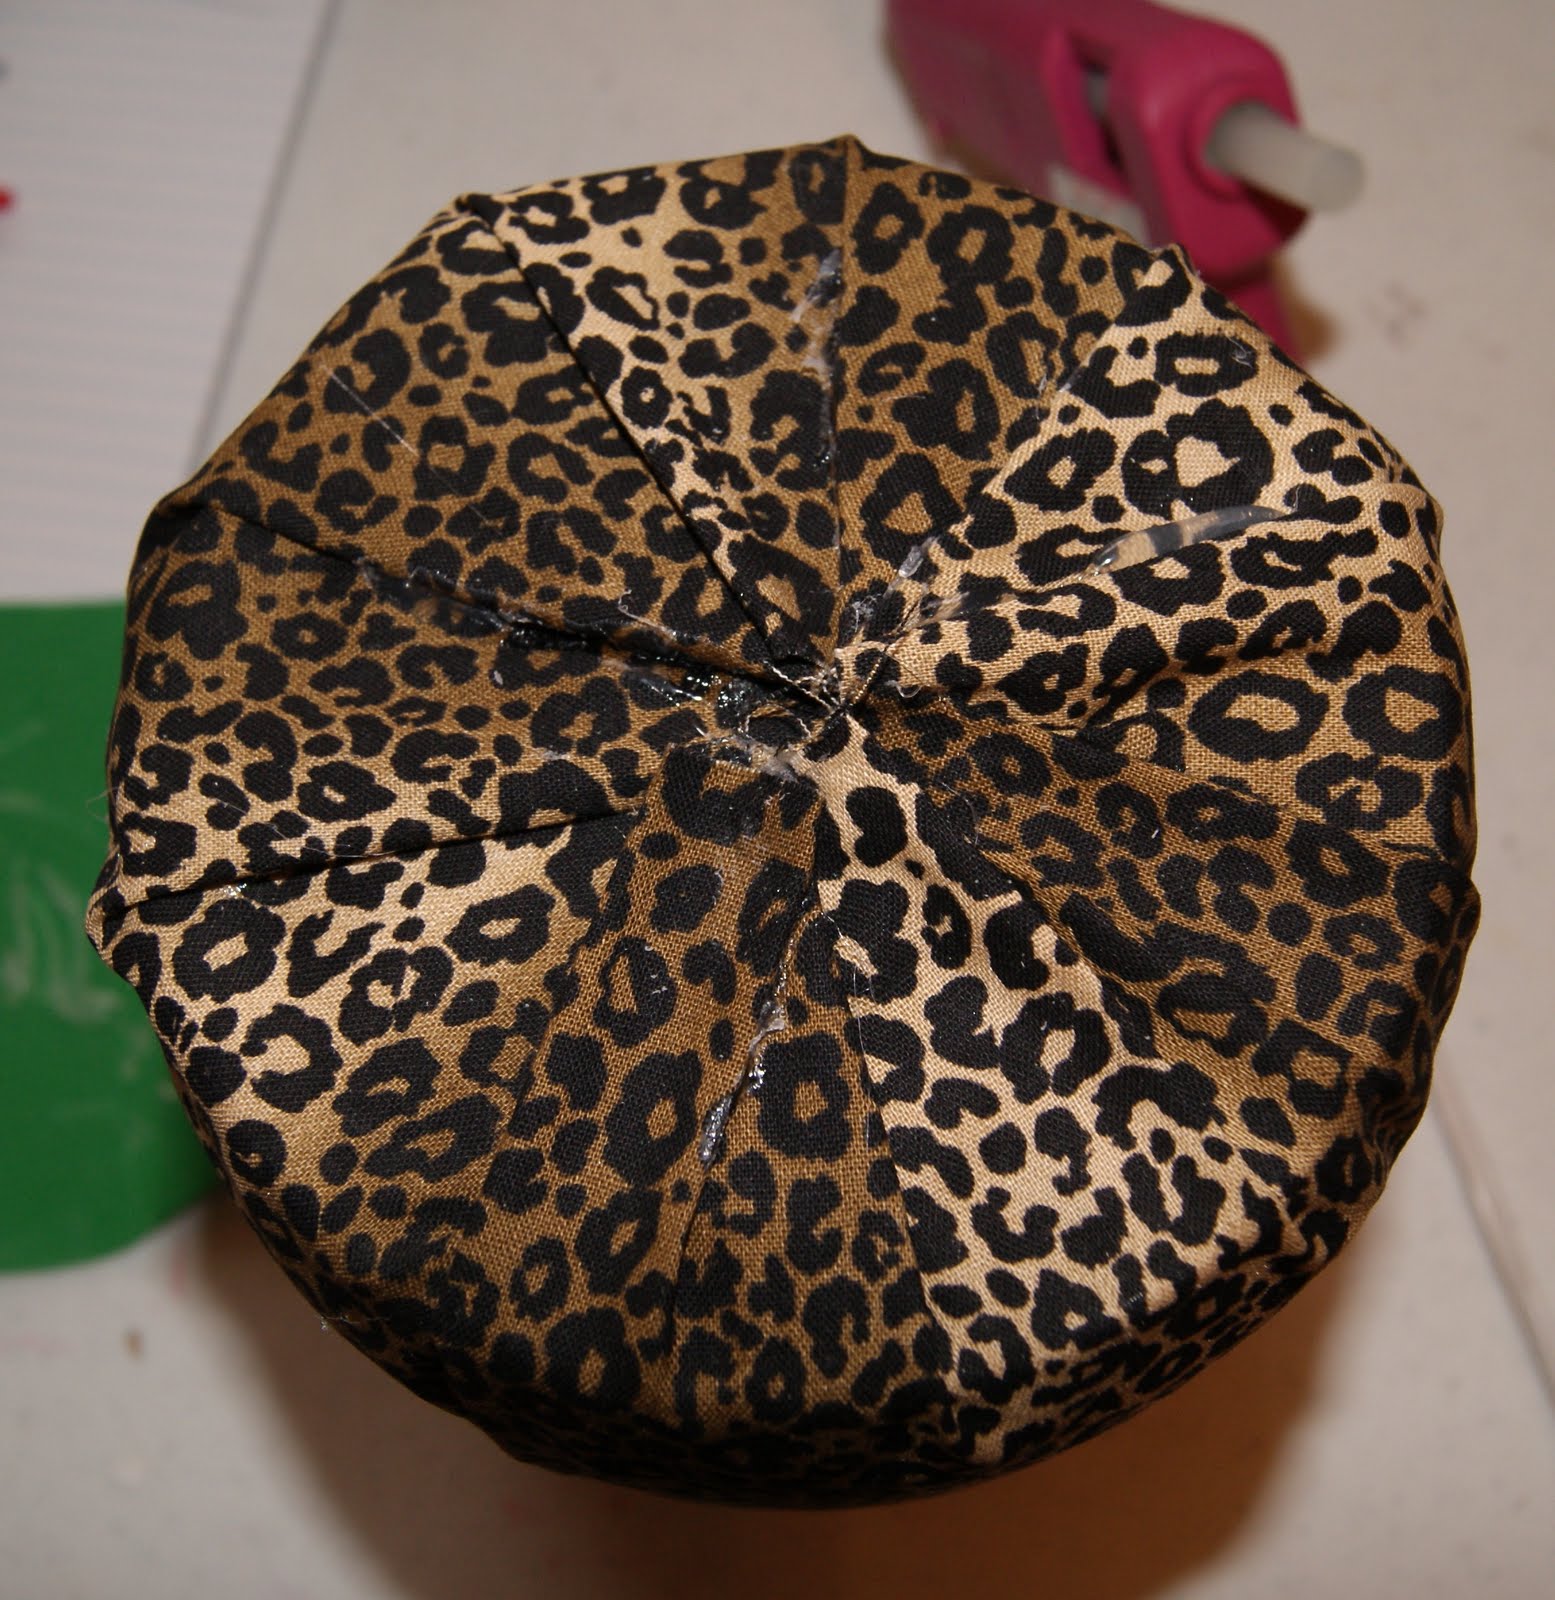
Glue the button on to cover up the icky stuff in the middle, and voila! Mama's new headband holder!

I LOVE how cute my hair candy looks on it. Meow!

So, let's review.
Before:
After:
Pretty:


3 comments:
I did a similar project. I covered my oatmeal container w/ scrapbook paper. But I think I like your version better! Great job!
oh my, BRILLIANT! I've been making a ton of headbands lately, but haven't known what to do with them. They are getting wrecked just sitting in the drawer! Thanks for linking up to Topsy Turvy Tuesdays!
Love it, and could you keep other hair "things" in side the container?
Thanks for sharing!
Post a Comment