Thursday, July 7, 2011

Be jealous.

Some projects don't turn out like you want them to. And some blow your expectations so far out of the water they end up in orbit around the earth. This is one of those times.


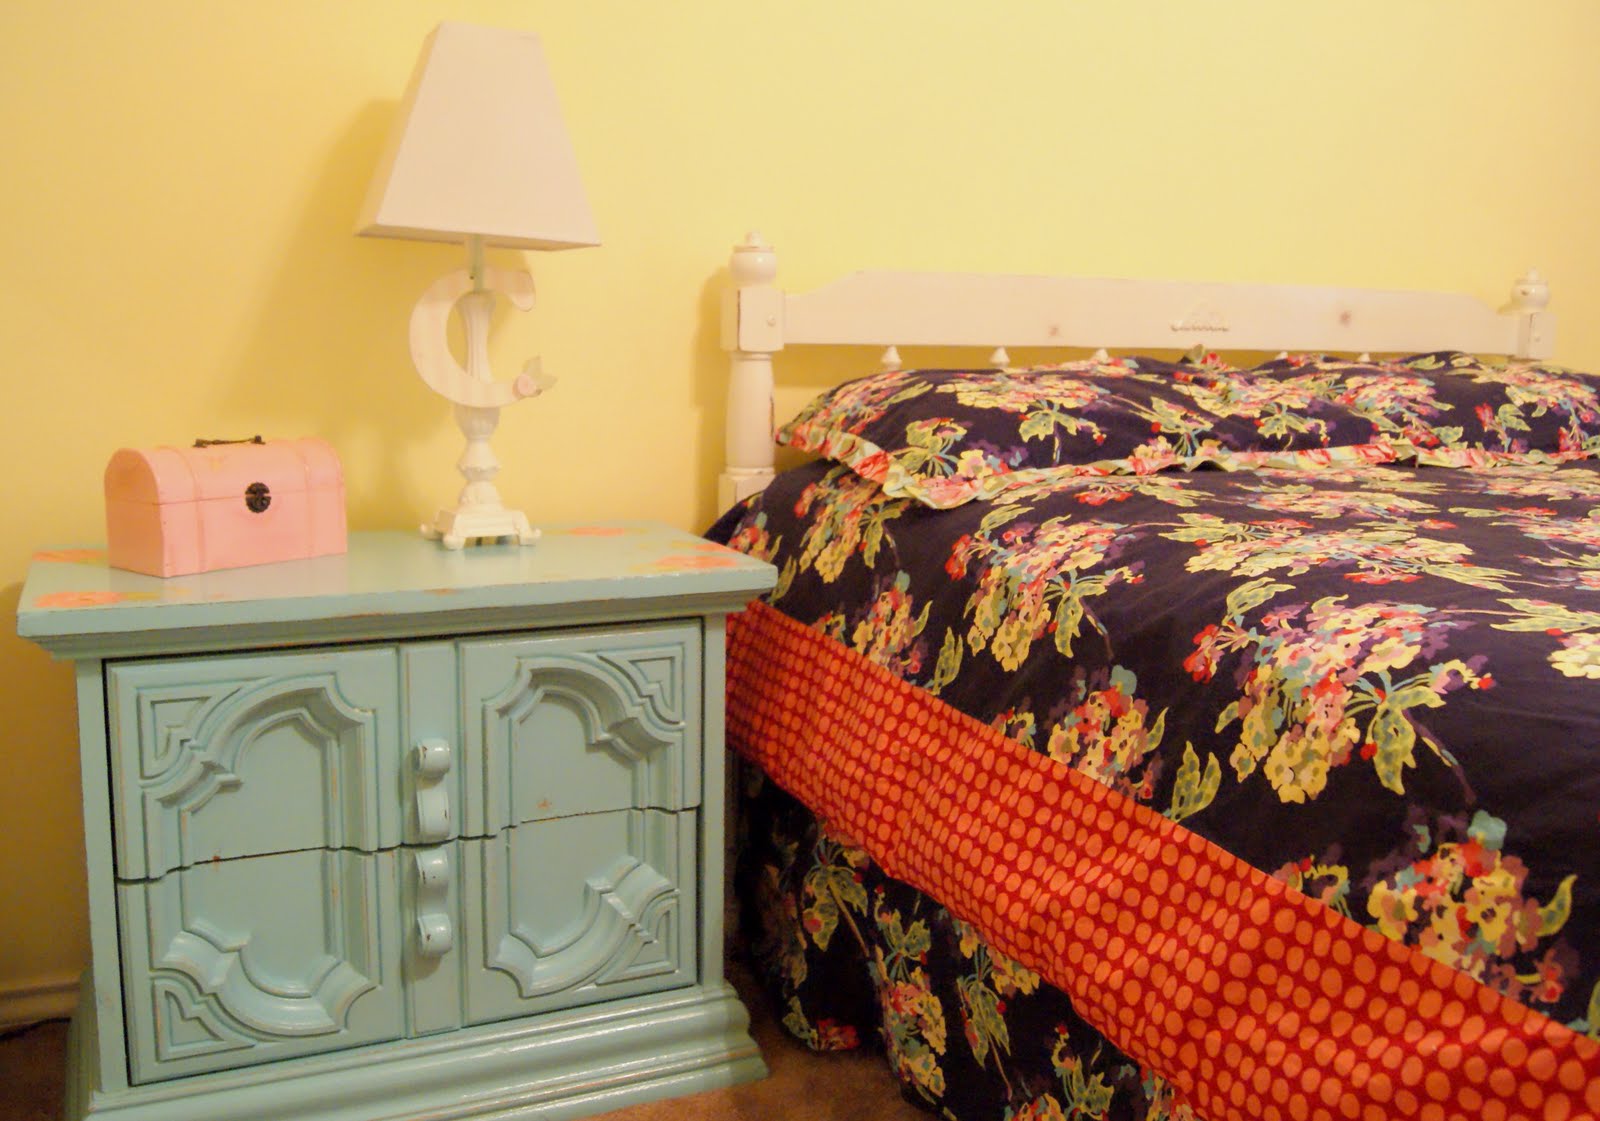
Remember this little gem? I picked it up at a flea market/junk shop in my small town for $20. As soon as I got it home and started inspecting it, I thought, "Crap. I got taken. This thing is a hunk of junk!" It has potential on the outside, but the back, corners, insides, etc. were not looking (or smelling) promising. It sat in the garage for about a week while I mulled over the possibilities. Then I took it to my friend Jessica and pleaded for her to help this poor wretched dresser become lovely again. And that is exactly what she did.


At home, I added two coats of polycrylic finish to it, and here it is in the room. It is painted to match an accent fabric in the bedding (the small ruffle around the pillow shams), and I've yet to make some larger shams, and a valance with that same fabric, which will really tie it all together.


Over and above anything I ever dreamed this hunkajunk could become! I tell you, she is a miracle worker.


Still, the inside was a problem. This dresser was meant to be a nightstand in my preschool daughter's room, and the drawers will be holding her clothing. So, they must be clean. And clean they were NOT. I scrubbed, sanitized, scraped, and still the smell and staining was ewwwgross. So, I had to cover it up. Here is what I came up with.


Scrapbook paper leftovers, Mod Podge, and then one quick coat of polycrylic to finish-- and perfection, no? Now this odd duck is beautiful, inside and out.

Be jealous of my serendipitous one-of-a-kind success!

Sunday, June 26, 2011

Reverse Knot Dress and Ruffle Peasant Dress

Fancy ruffled peasant dress:

Available in sizes 12m to 5Years here.


This is the New and Improved Reverse Knot Dress. It has wider, longer sash straps, and a ruffle at the hem. It is available here.


Monday, June 20, 2011

Distressed Dresser - before and after


I have had this thing finished for a couple of weeks, but forgot to post the pictures. Here is the dresser I painted to match the bed from the previous post. I L-O-V-E the pieces together.

Before: This dresser belonged to a friend, whose boys are grown and it wasn't being used anymore. It was originally painted (or stained) black, but her husband had started taking off the black already. I received it as a "project in progress" and was more than happy to transform this boy dresser into a shiny chic girly dresser!


After lots of sanding and about three coats of white paint:


Finished! I changed out the knobs to some fun mismatched glass knobs, and again added the wooden scrolly doohickeys on the cabinet door.


Doesn't the distressing look fantastic? Thanks again to my friend Jess!!


Here it is in Carly's room. I'm terrible at taking indoor pictures, so you get what you get, but I think it looks great with the yellow walls, and the pink and green accessories.


Next up: my crazy self bought this nightstand at a flea market..


It's a nightstand (or something) that looks like a cabinet with doors, except it is actually two drawers thast slide out. It's interesting! It's unique! It's gaudy! And sooo ugly!

I LOVE IT!

.....any guesses what my plans are for this gem?! It will go in the same room, but it ain't gonna be white, that's for sure! And it won't be one solid color. My husband just shakes his head at me.. :-)

Thursday, May 26, 2011

A New Adventure

I always have a project. I'm a project kind of girl. And I live in a project kind of house (it's not really a fixer-upper, but it's a needs-to-be-updated-er).

My daughter's room has been that room in this house. The one that is really fine the way it is, but I just don't love it. So of course, my project-needing self had to change it. I am far from finished, and let me tell you, I have GRAND plans for this room... but my next step was this bed.


It is an antique headboard and footboard that belonged to my husband's grandmother.


I have always loved it, but have not had a place for it in years. It was being stored in our attic. No more! I LOVE the way it turned out.


Perfect for my little girl, don't you think?


She loves it.


Here are a few of the in-progress photos:


I'm linking this post to:


Tuesday, May 24, 2011

Before and After Curtains

This post could also be titled "Why you need window treatments" or even "How curtains make a room" :-)


Before:


After:

Saturday, May 21, 2011

Nursery!

This a little bit of "why hasn't she updated her blog in forever?" I've been busy busy busy working on projects!

This is a finished nursery that I made the crib bedding and curtains for. I also made the diaper stacker and the changing pad covers. Jessica at Sparkles Boutique did the wall letters (ah-mazing!!) and the lamp shade. She is an amazingly talented lady. Camille (baby's mom) is a wonderful decorator and has done an outstanding job on this room. It's absolutely gorgeous!


And now I think I can say, officially, that I "do" curtains. I've been in denial for quite some time. :-)
Related Posts Plugin for WordPress, Blogger...