


To make the Zippy Pouch, you will need:
*Scraps of two different fabrics (about 1/4 yard of each)
*Scissors or a Rotary Cutter
* Cutting Board or Ruler
*Sewing Machine
*Pins
*9-inch zipper
*Fusible interfacing
Fabric cuts:
*Outside of bag: Two 8-inch by 10-inch pieces of fabric
*Lining: Two 8 x 10 pieces
* Strap: One 2.5-inch by 6 inch piece (longer (9-12 inches) if you want a wristlet handle, shorter (3-5 inches) if you just want to clip a key ring to it)
*Zipper End covers: Two 1.5x2.5 pieces in the contrasting fabric
*Interfacing: two 8x10 pieces, and one to fit the strap piece

1. Fuse the interfacing into the main fabric. Go ahead and fuse the strap piece too, and set it aside.

2. Fold the zipper end covers in half lengthwise (bring the short ends together) and press. The photo below shows the full size piece on top, and the folded piece on bottom.

Now, open it up and fold the ends in to the fold and press. (Basically, you are making a very short piece of binding/bias tape).

Insert the end of the zipper into the piece all the way to the fold. You may need to trim the end of the zipper some. Be sure to cover the little metal piece up enough that when you stitch over it you won't break your needle on it.

See? Nice and snug in there. Now, stitch very close to the edge of the cover, being careful not to hit that metal piece.

For the other end, repeat the process with the pressing and folding, but this time open the zipper (to get the zipper pull out of the way) and pin the zipper closed. Stitch the same way as before, very close to the edge, being careful to avoid the metal piece.

Here is your zipper after the ends are sewn on.

Now, take your main fabric and lay it on your surface. Place the zipper on it, right side down with the zipper pull on the left.

Then place your lining fabric on top, right side down, lining up the top edges neatly. Pin in place.

Stitch the entire length of the fabric, through the zipper ends, on the outside edge of the zipper. Turn the whole thing so the wrong sides of the fabrics are together, and press.

Next, lay your second main fabric piece on your surface, right side up. Lay the pressed piece we've been working on on top, main fabric down. Then lay your last peice of lining fabric on top, right side down. Pin all pieces together. Be sure your like fabrics are together-- lining to lining and main to main. Stitch in the same way as before - close to the zipper but not too close, on the outside edge. Hopefully this picture shows the stack well.

Once you stitch, you will have this:

Now it's time to make the handle. Fold your fabric lengthwise, right sides together, and stitch with a small seam allowance.

Turn the tube to the outside using a safety pin, loop turner, or this simple but ingenious trick.

Press the strap flat with the seam in the middle. Topstitch close to both edges if desired. (I did.)

Arrange the fabrics to that the like pieces are together now. Pin your strap near the zipper, in between the main fabric layers. Be sure the raw end of fabric match up and the strap goes toward the inside.

Also, pull the zipper end covers toward the lining fabric, which make the zipper itself fold toward the main fabric. Be sure to sew it like that. Stitch around the entire rectangle of fabric, leaving a 3-4 inch gap in the bottom of the lining for turning. Also, when sewing over the zipper ends, try to sew right next the them, and not through them. If you have to sew through them, it's okay too.

Almost finished! Clip the corners and turn the bag right side out. Press the lining, and sew the hole closed, stitching very close the the edge.

Stuff the lining inside the bag, and press the entire bag.. And there you go! Stuff some stuff inside and go show it off!

p.s. This is what your zipper ends should look like:

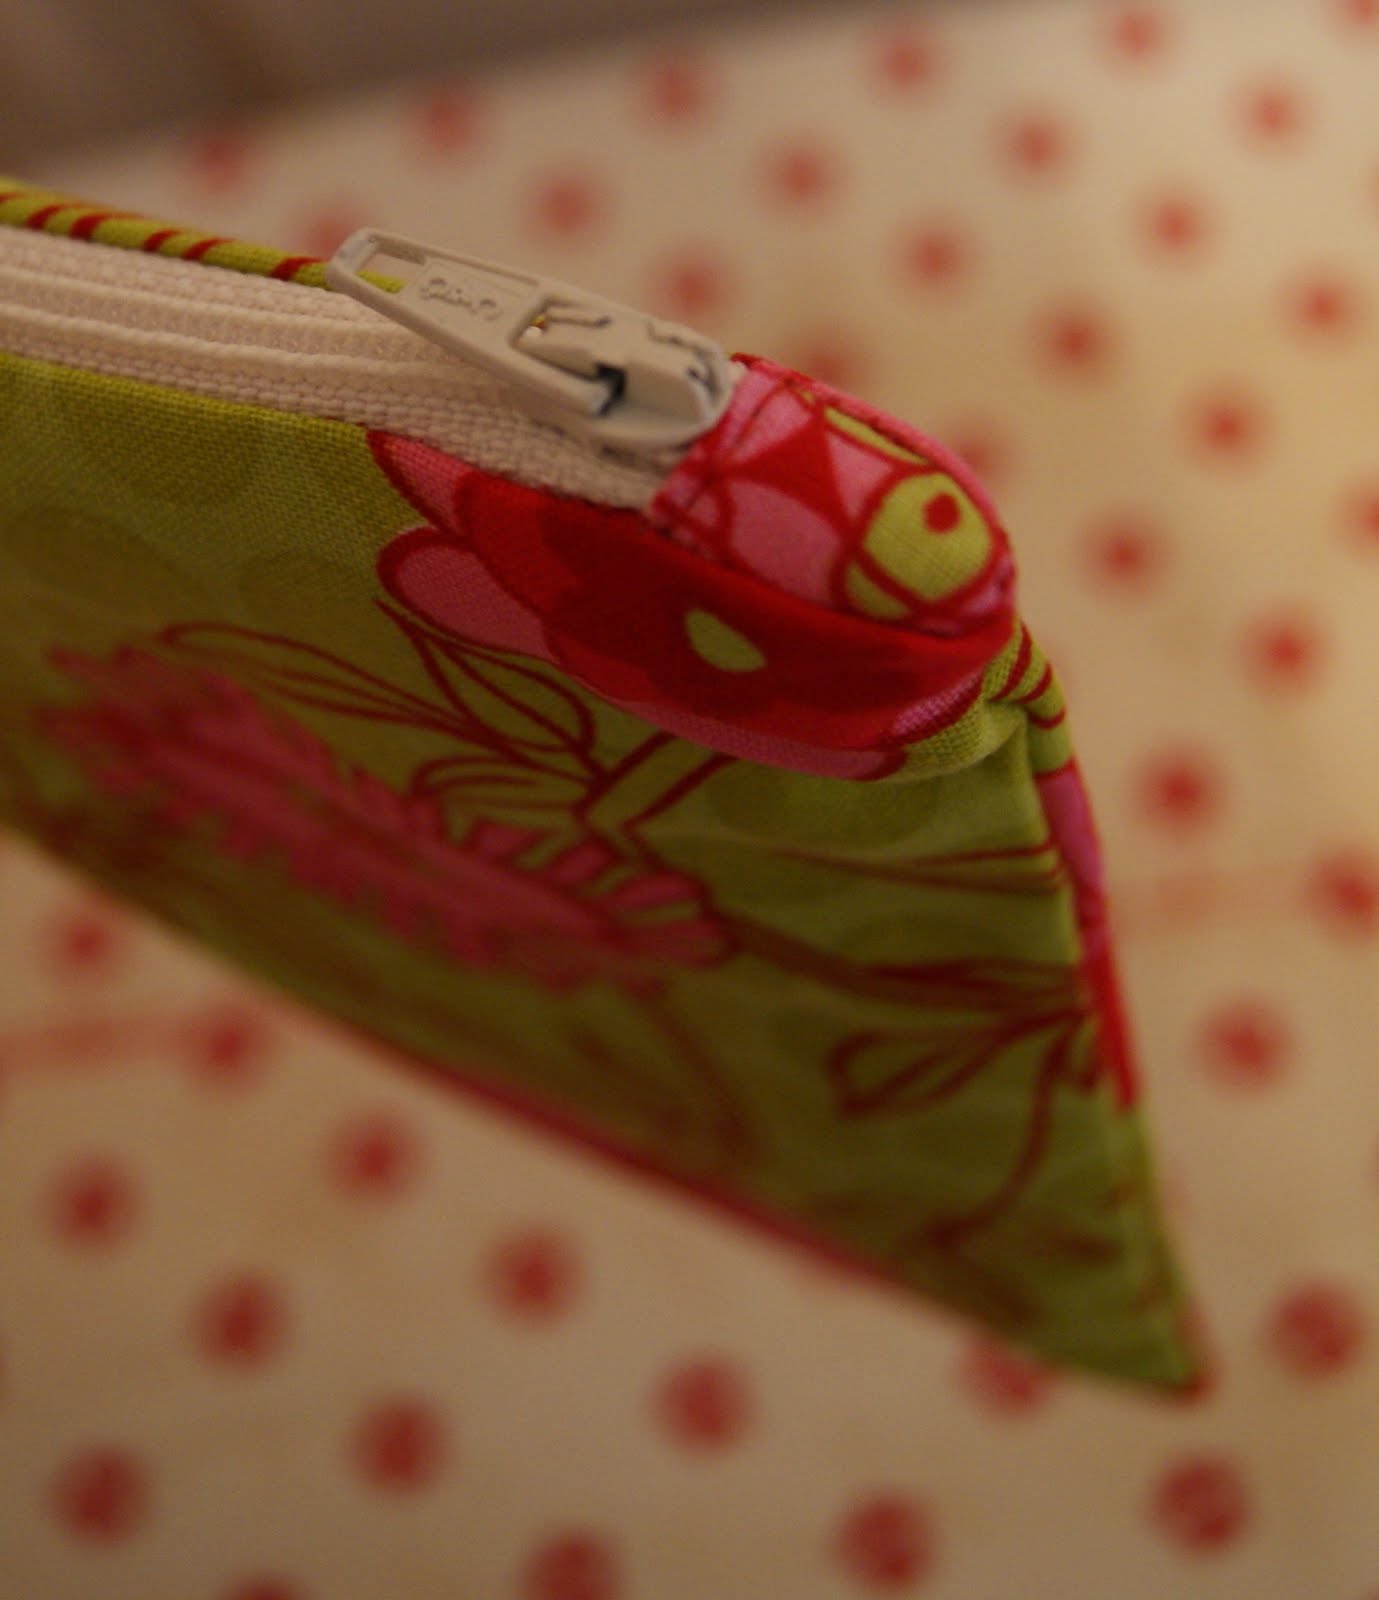
Nifty, huh?
{GIVEAWAY CLOSED}
Now, for my surprise! One lucky reader is going to WIN this bag! To enter, all you need to do is leave a comment on this post, telling me if you understood the instructions well enough to make a bag yourself! If there is anything I left out, feel free to tell me. I'm still working on my tutorials, and want to know if they are any good :-)
Also, for additional entries you can:
*become a follower of my blog
*become a fan on Facebook (or "like" me)
*post a blog post about the giveaway/tutorial on your blog and leave me the link in a comment
*post about the giveaway/tutorial on your Facebook status and tell me about it
Remember, leave a separate comment for every entry. Which means you can have up to five comments! If you are already a follower or fan, I still need you to leave a comment for each.
I'll randomly pick a winner on Monday, November 1st.. so you have until then to enter!
Go get busy!


