Showing posts with label kids clothes. Show all posts

Thursday, March 3, 2011

Pillowcase Dress Tutorial

Alright, here it is! I originally learned how to make a pillowcase dress from this blog, and I still use basically the same technique, but when I went to find that old tutorial, the pictures were gone and it had all been redone. So I did my own tutorial and am going to send it to my mom in Africa for her girls to learn!

To make a pillowcase dress you will need:
- 12 inches of 1/4" wide elastic (not shown), cut in half (two 6-inch lengths)
- scissors
- sewing machine
- straight pins
- steam iron
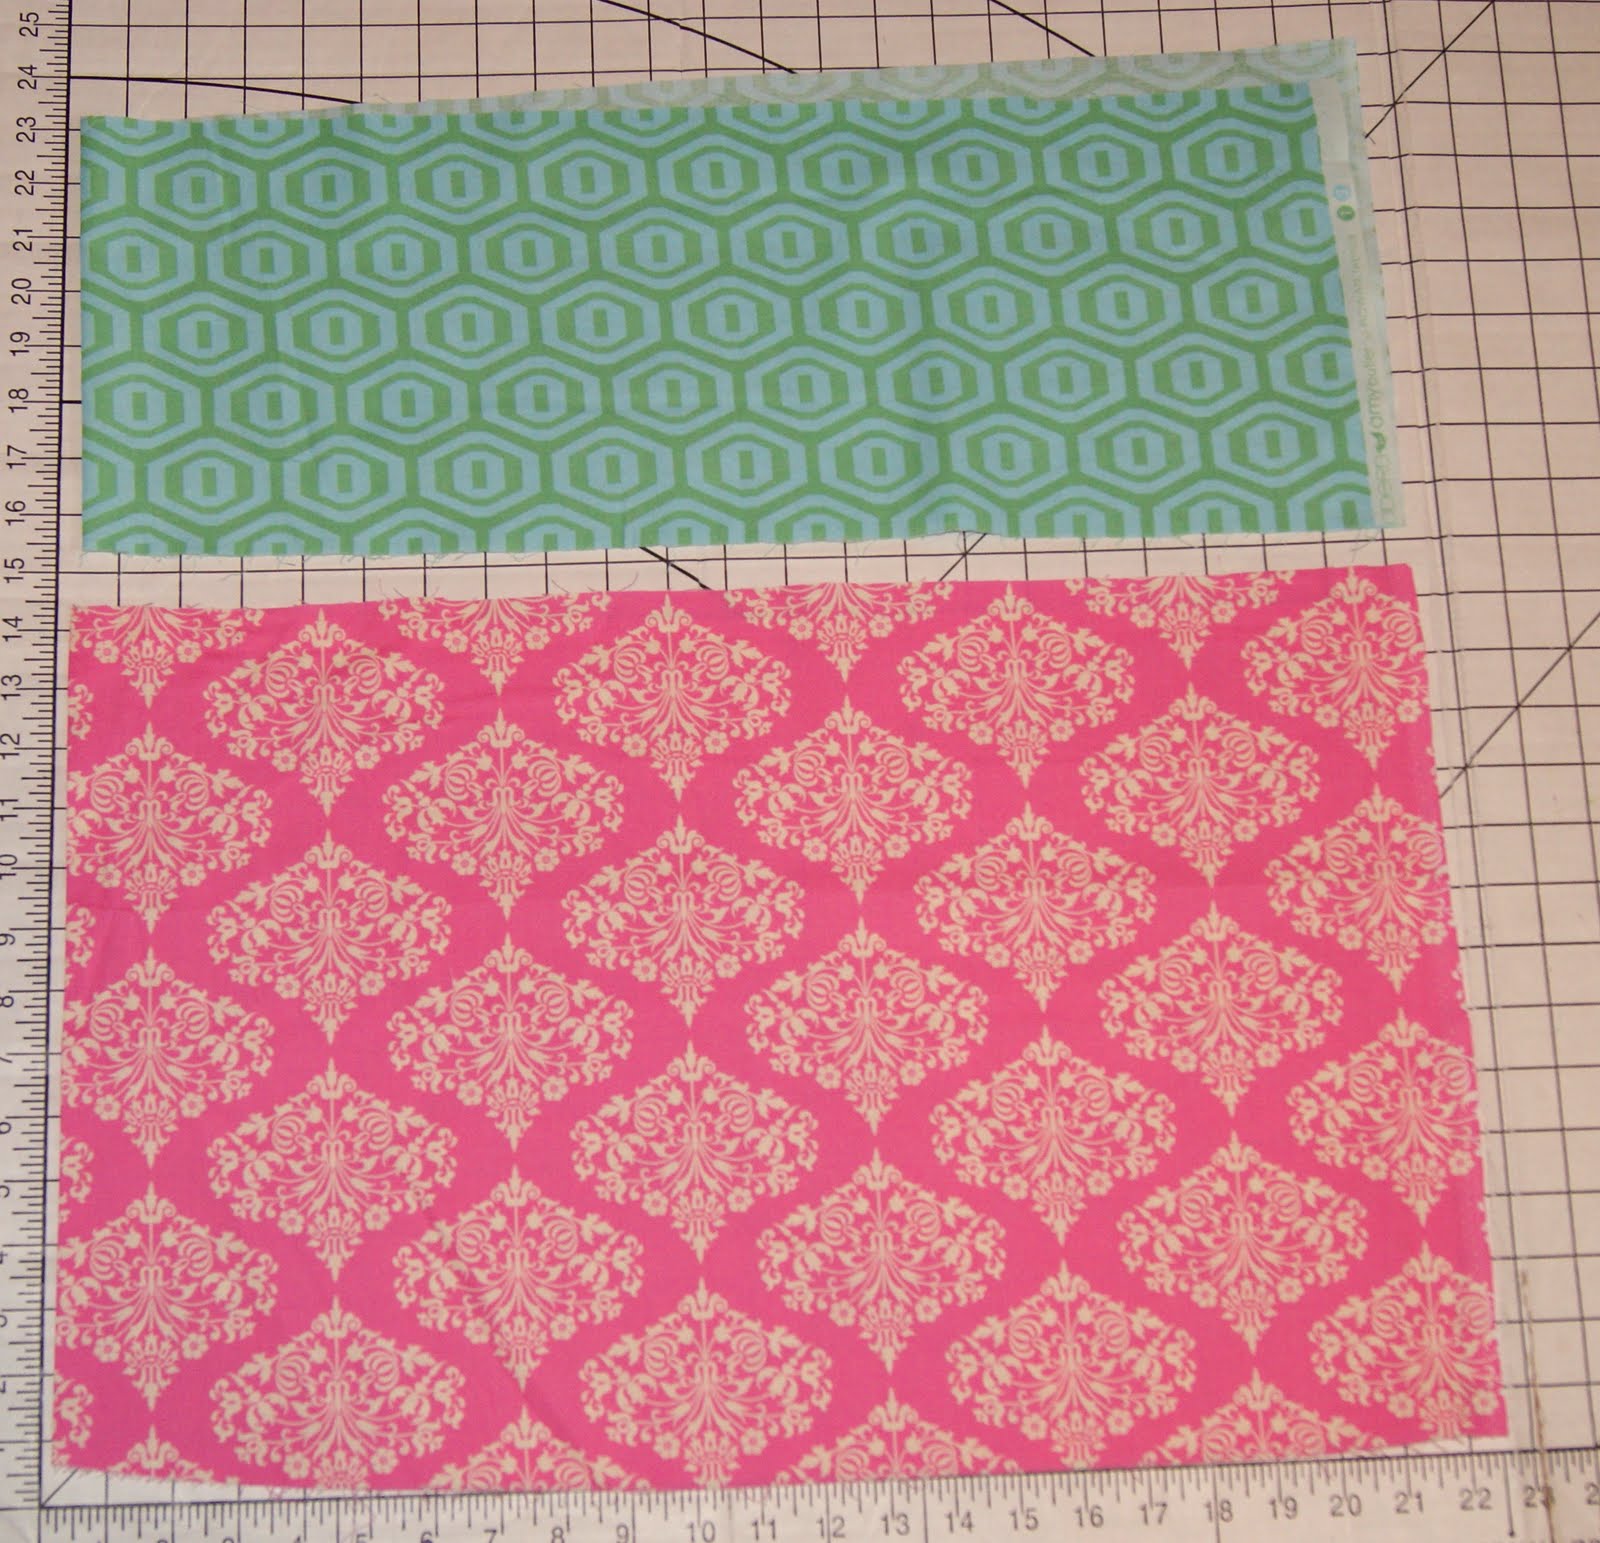
- fabric cut as follows:
- two strips 2.5" wide the entire width of fabric on fold (2.5" x ~45") for straps OR 45" of extra wide double fold bias tape.
- 45" wide piece of fabric cut to the length of choice (see size table below)
- optional coordinating piece for trim at hem - 4" x 45"


See the cuts laid out below:


Step 1: Fold the dress inside out, and sew the raw edges together, making a square with open top and bottom.


Move the seam to the middle of the square, as shown below:


Then, fold the entire square in half.


So, you have to folds, folded together.


Press the edge down to make creases. You only need to press down about 8 inches or so. This makes it easier to find the middle later.


Now, take the scissors and cut an upside down "J" shape in the top edge, through all the folds of fabric. Discard those two pieces of fabric.


Unfold and now you have this:


Step two: Make straps using the two skinny lengths of fabric. We are essentially making extra wide double fold bias tape. Feel free to substitute if you have some on hand and want to save time.

With an iron, press down the short end.


Next start down one side of the strip and press in about 3/8." Repeat on the other side.


Then fold strip in half and press again, so that you have a double folded strip with an open edge.


This is what one strap looks like:


This is the strap next to a real piece of bias tape. Same concept.


Step Three: On the dress, fold over the top raw edge about 5/8" to make a casing. Press. Repeat on the other top raw edge.


Sew near the folded over edge, making a 1/2 inch casing.


If you have a tag to attach, do it now, as your needle nears the middle seam on the back.


No take your 6-inch piece of 1/4" wide elastic and run it through the casing, using a safety pin to guide it through.


When you get to the end, put a safety pin through the entire casing and elastic about 2 inches in from the edge.


Continue pulling the elastic through, and pin the other end about 2 inches in.


So now you have this:
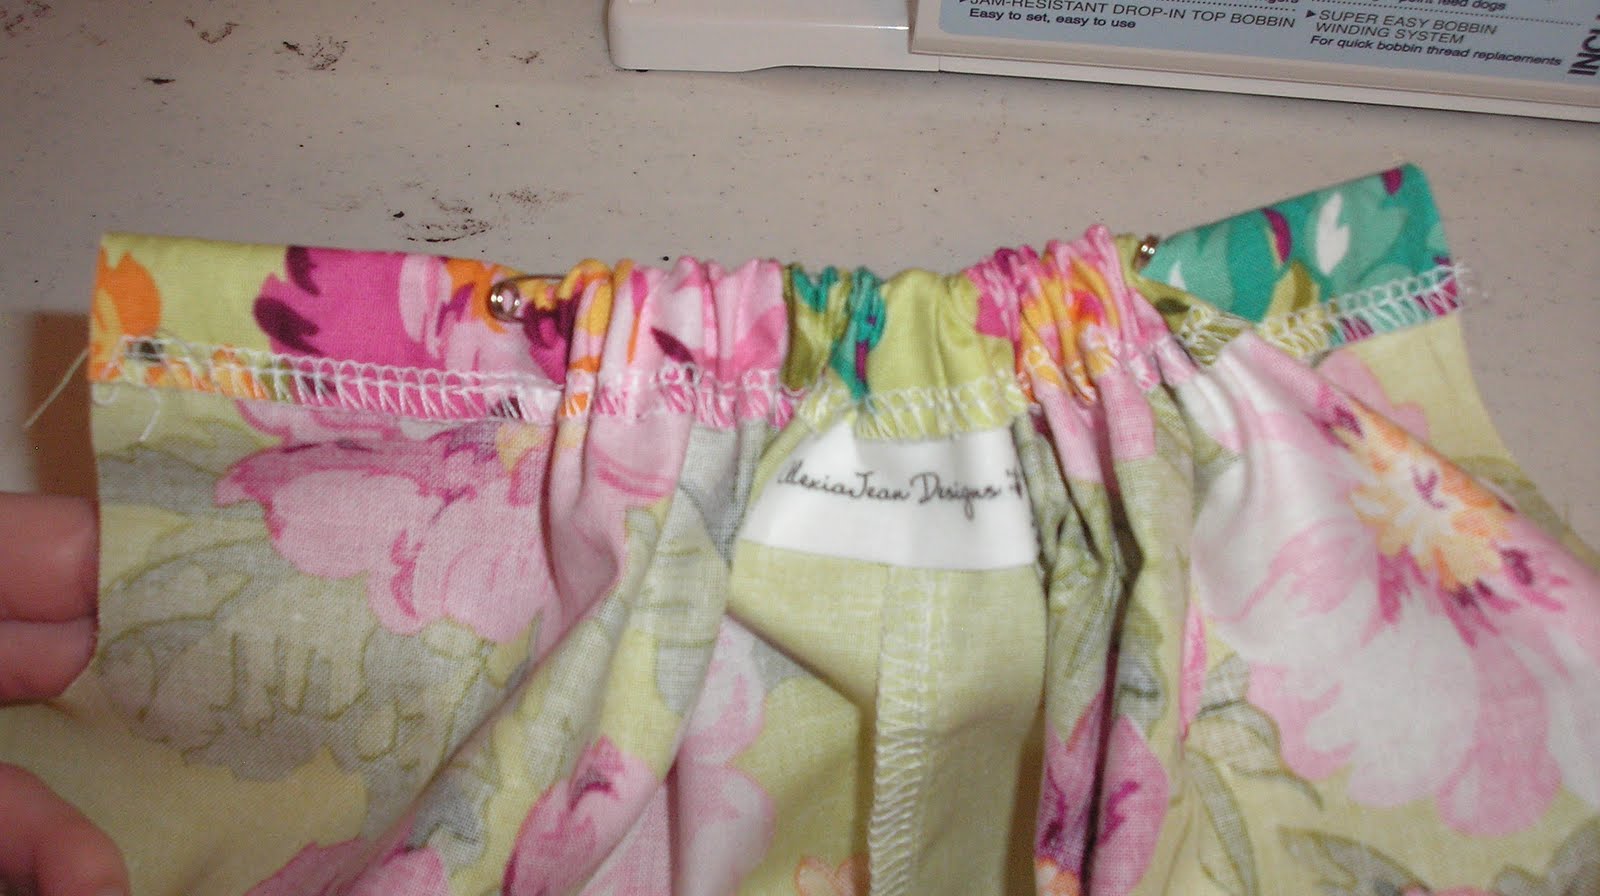

Repeat on the other side with the other piece of elastic.
Stitch the ends of the elastic in place very near the edge of the casing. Do this on all four elastic ends.


Here's your sewn down end. Do not take the safety pins out yet.


Now you have an inside-out dress with elastic necks. All that's left now is to attach the arm straps!


Find the creased middle of the under arm and the middle of your strap. Open up the strap and insert the dress up to the crease.


Fold the strap back over, and pin in place.


Now, starting from the end of the strap, sew close to the edge all the way down the strap, through the underarm area, and back out to the other end. Repeat for the other strap.


Here is how the seam should look on the outside:


And on the inside:


Note: Make sure you catch both the top and the bottom of the arm strap when sewing. It takes some practice, and precise pinning and pressing.

Now you can take the safety pins out.


Pull the elastic to distribute the neck evenly.


Last, finish the bottom edge of the dress. (In this one, I added a coordinating strip at the bottom after the fact.)


Finished! The arm straps go under the arms, and the elastic casings go around the neck. Dads dressing little girls can get it backwards easily, believe me :)


Pretty!

Wednesday, December 22, 2010

Christmas Dresses

I am in love with this fabric from Michael Miller's Christmas collection! It perfectly captures the colors and patterns that I like for Christmas-- not too dorky and not too formal. I made as many reverse knot dresses as I could and squeezed every inch out of the fabric! Carly ended up with one mess-up, which worked out beautifully for our family pictures. I also made a few boy ties to match, and they were a hit too, as usual.


...And one custom pillowcase dress and pigtail bows!

Thursday, November 11, 2010

TShirt Dress Tutorial

So, you know, things happen sometimes. You screw up an order, and have to redo it. But what to do with the messed up leftover?


In this case, the back hem of the shirt I was embroidering got caught up in the embroidery hoop. *Headslap* I had to cut a hunk out of the shirt to get it out of the hoop.


What to do? You make a dress out of the messed up Tshirt.


Ready to learn how? I promise it's easy! Here we go!

What you need for a child-size dress:

*One tshirt
*Two coordinating fabrics (about 1/2 yard of the main one, and 1/3 yard of the other.)
*Sewing machine and notions

Optional Stuff:
*Serger
*Ruffle Foot

To start, cut the bottom off the shirt. On this one I had to go below the butterflies. Otherwise I would recommend cutting about two inches below the arm holes. That will give a nice empire waist look.


Next lay out your fabrics. Measure how long you want the skirt to be. This one is about 17 inches long. For the bottom band, cut a 4.5-inch side strip using the full width of the fabric. Make up the difference with the main fabric (plus one inch). This skirt is 13 after I trimmed up the edges.


Lay your main fabric down on your surface, and line up the bottom band raw edges, right sides together.


Sew raw egdes together. I'm using a serger, but of course you can use a regular sewing machine.


Next, open out the entire piece of fabric and press the new seam down. Then fold the piece in half, right sides together, and sew up the side, being sure to line up the bottom band with itself.


Now you have this: On the left is the seam you just finished, on the right is a fold. The top edge is still raw.


Now it's time to gather the skirt to fit the shirt. You can use a ruffler foot if you have one, or you can use gathering stitches to pull it up. For help with that check out this tutorial.


So now you have a chopped off tshirt and a gathered skirt.


Now take the leftover strip of coordinating fabric and fold it over longways. This one is about 2.5 inches wide. I would have liked if it was wider, like 3.5 to 4 inches. Sew raw edges together to make an inside-out tube. Use a very small seam allowance.


Leave a gap in the stitching about 4 inches long.


About one inch from the end, turn your fabric to a 45-degree angle, and sew to the fold. this makes a pretty end to your sash tie. Go back and do this on the other end as well.


Trim the seams and clip the corners of both ends. Then turn the tube right-side-out and press it flat. For help with that, click here. Sew the opening together very close to the edge. I didn't get a picture of that step.


Now you have a chopped off Tshirt, a gathered skirt, and a long sash.


Turn the shirt inside out and fit the raw edges together. Use pins liberally to keep everything in place. Adjust the ruffles or gathers to fit the width of the shirt.


Stitch on a 1/2 inch seam allowance. Make sure to put the non-stretchy fabric down on the machine's feed dogs.


Turn the dress right-side out. Pin the sash over the middle of the seam, centering it in the middle of the skirt. Stitch the sash close to the edge, stopping when you get to the sides/underarms. The sash will be attached across the front of the dress and free in the back.


Stitch the top edge in the same way.


This is what the side looks like. This is just under the sleeve of the shirt.


Hem the bottom and you are finished!


If you have a baggy shirt like this one, the sash helps to cinch it up in the back to make it more form-fitting.


Tips:

*You can adjust the measurements to make this dress for any size. In fact, this is very similar to my maxi dresses that you can see here.

*Using a more fitted tshirt and cutting the waistline a bit higher would make a more flattering shape. But we scrap-a-holics do what we can to reuse and recycle anything and everything!
Related Posts Plugin for WordPress, Blogger...